
Setting up a WordPress site may seem daunting at first but is, in fact very simple if broken down into manageable steps. WordPress is actually the best creator for your very first website. In this tutorial, we will explain everything you need to know so that your WordPress website functions flawlessly. After the end, you will have a fully operational, visually pleasing website that can present your brand or idea well. Here’s to getting into it and having an easy, enjoyable journey in building your website!
Step 1: Selecting a Domain Name and Hosting Service
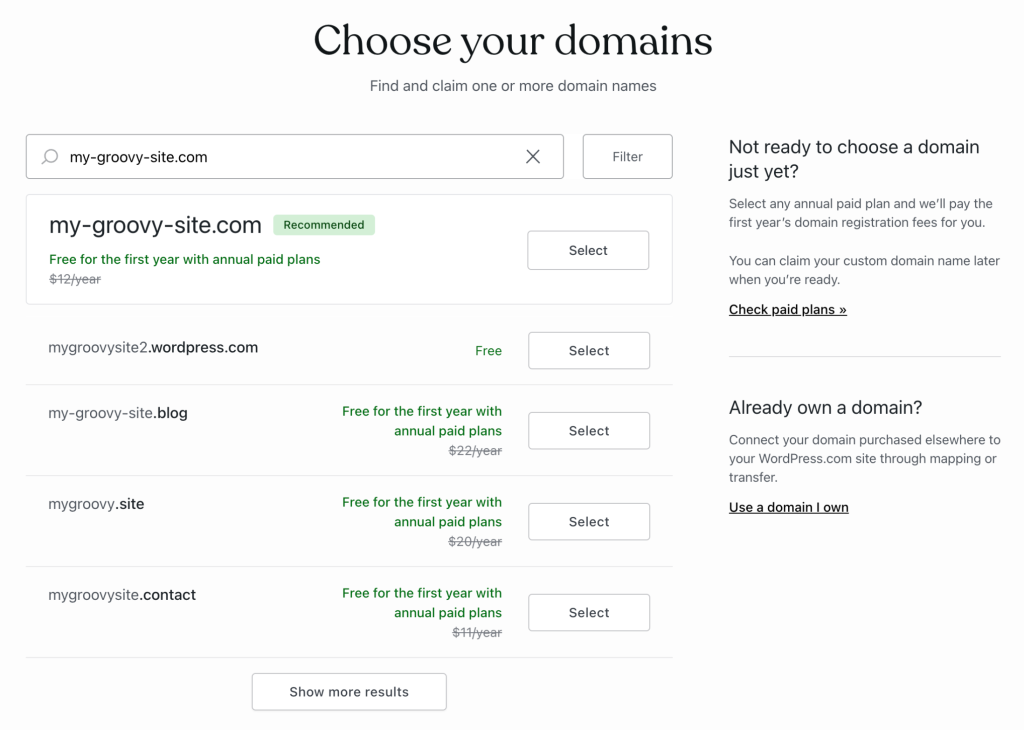
First things first: picking a domain name-the address of your site, like www.yourwebsite.com-and a hosting service-a service which stores the files of your website.
Registering a Domain Name:
• Relevance : The domain name needs to have direct relevance to the brand or the topic of the site..
• Simplicity : A domain name needs to be short, simple and should be easy to remember.
• Extension : Most common being the .com, .net, or .org, but others, such as .shop or .blog, will be OK depending on your site.
Host Provider Choice:
• Reliability : Ideally, a good host provider should have a great uptime record so that your site will always be accessible.
• Speed : Choose a host provider that can give quick loading to increase the value for users.
• Support : Choose providers that offer 24/7 support especially if you’re not too tech-savvy.
Step 2: Installing WordPress

After getting your domain and choosing your hosting plan, you would then have to install your WordPress. Most of the hosting services offer a one-click WordPress installation so to make the process easier.
One-Click Installation:
1. Access your hosting account: Look for the control panel, usually cPanel.
2. Locate the WordPress installer: This will often be located within a “Website” or “Script” sections.
3. Click ‘Install’: Now follow the instructions on your screen. This will in most cases prompt you to choose your domain and set an admin username and password
4. Installation complete: After some minutes, you receive login details as WordPress is installed.
Manual Installation:
1. Download WordPress: Find the latest version of WordPress.org
2. Upload using FTP: Use ftp software; in this case, we use FileZilla to upload files in your server using FTP.
3. Setup Your Database: Use your control panel with your hosting to create a MySQL database.
4. Run the Install: When you go to your domain name, you will be forced to complete the installation by entering your database information.
Step 3: Themes and Installing a WordPress Theme

Themes for WordPress hold absolute power over the aspect or look and feel of your website. There are thousands of free and paid themes in total.
Theme Selection:
• Purpose: Choose a theme that is relevant to your website’s intent, for instance if it’s a blog, an online e-commerce or portfolio.
• Customization: Look for themes with options that would personalize it according to the brand’s identity.
• Responsiveness: A theme must ensure responsiveness since most visitors come through mobile devices.
Installing a Theme:
1. Appearance > Themes: Surf into your WordPress dashboard towards “Appearance” and click “Themes.”
2. New: This is where you can view free themes from the WordPress repository.
3. Search and Preview: Use the search box on the screen to view all available themes; click “Preview” so you know how it would look.
4. Install and Activate: When you liked some theme, click “Install and Activate”.
For paid themes, you would mainly download a .zip file so you can upload it from the option “Upload Theme”.
Step 4: Customize Your Site
Having chosen your theme, it is now time to configure your site to look and feel like your brand.
Customizing the Theme:
1. Appearance > Customize: This will open the WordPress Customizer where you can change things in real time
2. Modify Site Identity: Site Title and Tagline – fill in the title and tagline for your site. Add a logo.
3. Colors and Fonts Change: According to the theme, change colors and fonts based on your brand.
4. Change the layout and menus: Customization of your site’s layout, especially with regard to its header, footer, and menus.
Step 5: Install Essential Plugins
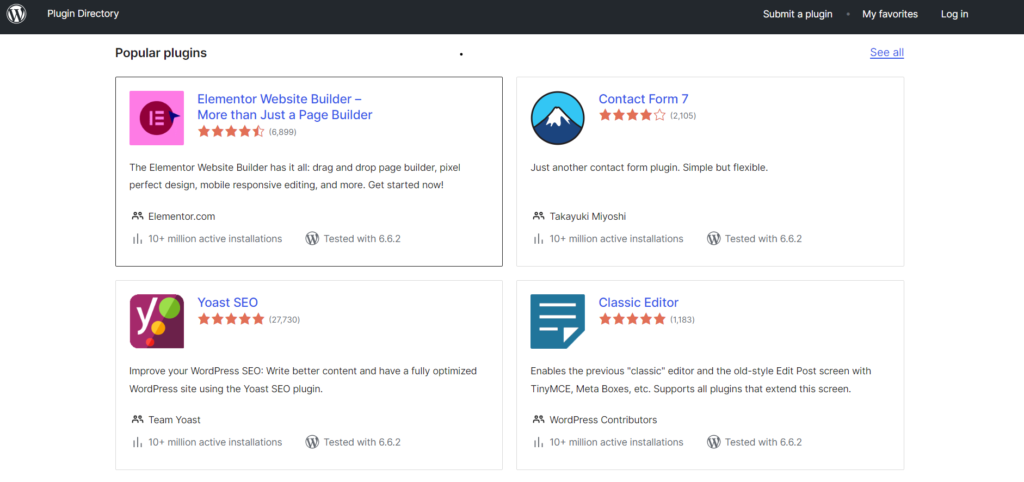
Plugins are the apps of your WordPress site, extending functionality like WordPress SEO optimization, contact forms, and security features.
Some Must-Haves to Consider:
Yoast SEO: Friendly in Helping Optimize Your Content.
Contact Form 7: This is the main plugin and also lets you design any form of contact.
Akismet: End secluded spam comments on your site.
WooCommerce: Best e-commerce plugin if you’re setting up an e-commerce site – WooCommerce.
WP Super Cache: This is one of the best ways of speeding up your website by way of page caching.
Adding Plugins:
1. Go to Plugins > Add New: In the WordPress dashboard, go to “Plugins” and click “Add New.”
2. Find and Install: Using the search bar, find the plugins you require. You must click “Install Now” and then “Activate.”
3. Configure Plugins: Once the plugin is activated, you will need to configure it in relation to your needs.
Step 6: Create Your Pages

Create basic pages like Home, About, Services, Contact, and Blog so that your website will be both useful as well as very user-friendly.
Creating Pages
1. Access WordPress: To access the WordPress dashboard, go to Pages > Add New. You can do it by clicking on “Pages” from the list and then clicking “Add New.”
2. Add Content: Use the WordPress block editor called Gutenberg to add and format your content.
3. Publish: Once you’re happy with your page, click “Publish.”
Important Pages to Include:
• Home: Most viewers are going to look at the first page visited. Consider adding an overview of what your website offers.
• About Page: Information about yourself or business will help foster trust in visitors.
• Services/Products Page: Detail your services or products.
• Contact Page: Add contact form, e-mail and also your phone number.
• Blog Page: If you have any posts, add a separate blog page.
Step 7: Set Up Navigation Menus
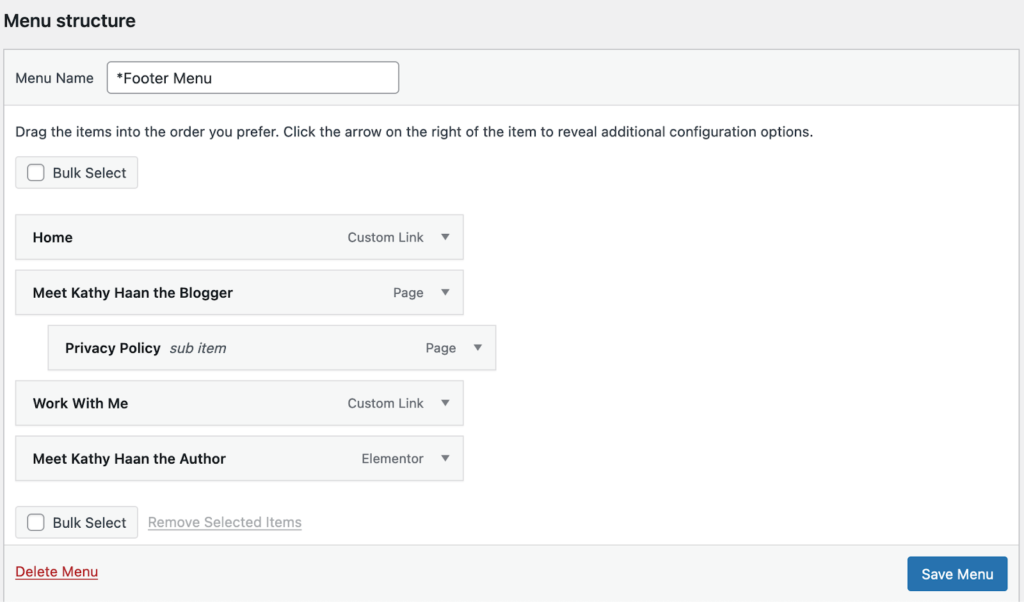
Menus are that really help in easy navigation around your website. You will be able to link pages, posts, and other content.
Creating a Menu:
1. Appearance > Menus: In the WordPress dashboard, go to “Appearance” then click “Menus.”.
2. Make a New Menu: Select the drop-down menu and choose “Create a new menu,” give it a name and select “Create Menu.”
3. Add Items: You will be able to add pages, posts, as well as custom links from the side panels into your menu.
4. Determine Menu Location: Select where you want your menu to appear in your website, such as primary or footer menus.
Step 8: Configure Your Website Settings

To establish that your site’s setup is correct, some major settings such as permalinks, reading and discussion options must be configured.
Configuring Settings:
1. “Settings > General” – Set your site title, tag line, and timezone.
2. “Settings > Permalinks” – Set a structure for SEO-friendly URLs (e.g., Post name).
3. “Settings > Reading” – Set your homepage display and blog pages.
4. Settings – Discussion In “Settings > Discussion”, manage comments, moderation, and spam protection.
Step 9: Test and Launch Your Website
Test your site once more before taking it live to make sure everything works as expected.
Testing Your Site:
• Responsiveness: Run your site on devices and varying screen sizes-to make sure your site is mobile-friendly.
• Test forms and Links: All forms and links must function properly.
• Load Speed: Make use of tools such as Google PageSpeed Insights to gauge how long it takes your site to load and optimize when necessary.
• Cross-Browser Compatibility: Run your website on various browsers such as Chrome, Firefox, and Safari.
Step 10: Launch and Maintain Your Website
Once everything is in place, fully tested, it is now time to launch your website.
Launching Your Website:
• Publicize the Site: publish it to as many social networks, email newsletters, or channels you have.
• Submit to Search Engines: using Google Search Console, provide your sitemap and let it crawl index your site.
Ongoing Maintenance:
• WordPress Update, Themes, and Plugins: Standard updates to the latest versions ensure you are secure and running efficiently.
• Backup your Website: Plugins like UpdraftPlus schedule regular backups.
• Monitor Performance: In order to track website speed, uptime, and user analytics, you can make use of Google Analytics tools among others.
Having followed the above steps you possess a professional WordPress website ready for business. Notably, building a website is just the starting point, after which it requires proper maintenance and updates for continued success.
Benefits of Using WordPress
1. User-Friendly Interface
WordPress is user-friendly, even to an individual who is using the software for the first time. Its dashboard is easy to use in creating and managing content without any need for technical knowledge and code literacy.
2. Customization Using Themes and Plugins
With a number of thousands of themes and plugins, WordPress development company enables complete freedom in the matter of choosing a design and functionality for your site. You can create anything-from a blog to an e-commerce site with contact forms, SEO tools, and shopping carts.
3. SEO Friendly
With a focus on SEO, WordPress boasts clean URLs, responsive design, and incorporates plugins such as Yoast SEO so that your content is optimized for search engines, increasing the chances you will rank higher in search results.
4. Flexibility and Scalability
WordPress adapts to the needs and growth of your business. It can handle anything from a small blog to a large e-commerce store, letting you add new features as your website grows.
5. Strong Community Support
WordPress is massive and has an active community; therefore, it provides full potential support through forums, tutorials, and documentation. You should easily find solutions to problems or seek advice on best practices.
What’s Next?
Trying to use a WordPress development company to increase leads and sales? With more than 15 years of expertise, Bloom Agency is expert Wordprss development company, providing excellent services that yield outcomes. Custom WordPress web design built by our knowledgeable staff
- Custom WordPress Web Design
- Development & Design Mobile-Friendly
- Adaptive Layouts
- Dedicated In-House WordPress Developers
- User-Friendly WordPress CMS


Rahul M.
B2B Service Provider